
In this article we are going to learn how to automate web browser in C#.
How to automate web browser in C# – Source Code
Why would I need to automate web browser in C#?
Browser automation is not a new idea. It has been around for a long time. I am constantly using this process while building my own web-based applications. But everything started quite simple. By building a simple web scraper app for my own personal use.
One of the reasons why a lot of developers got to automate web browser in C#, is because of the need for website testing. Imagine having a complex web site without the option to test what happens when you click on a button. It is quite difficult to ensure that changing a piece of code won’t affect the current functionality.
Or even better. Try testing a certain UI/UX flows. It is impossible to test such scenarios on the web. And this is exactly why you need to learn how to automate web browser in C#.
What is Web Browser Automation?
Let’s recap. Web Browser Automation is the process of controlling a browser’s behavior. Or in our case controlling said behavior programmatically. This allows us to automate some boring tasks, scrape data from the web, run website UI/UX flows, run performance tests and much more.
Now that we know all about the process, let’s see how to automate web browser in C#.
What are we going to build?
In this tutorial we will see how to automate web browser in C# through a simple console demo application. We are going to build a tool that will execute a search query on a website and navigate to one of those search results. We will also go over some of the basic features that you may find useful such as: find and interact with an HTML element, submit a form and much more. Our language of choice? C#.
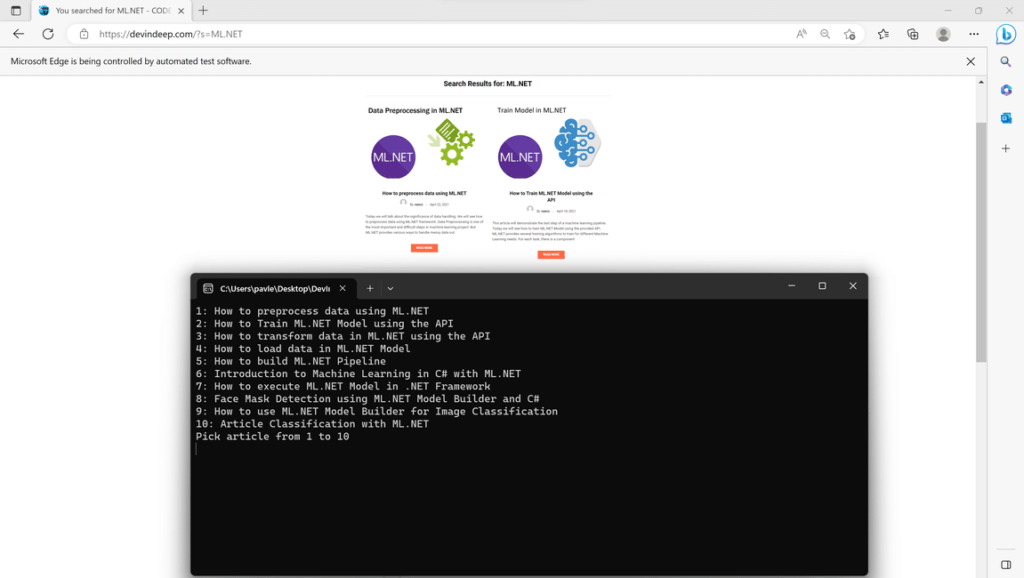
The application we are going to build is actually quite simple. A command prompt application that will be able to search devindeep.com for ML.NET tutorials. Then it will display the search results to the user and the user will choose where to navigate next. Simple but effective. This project will allow us to cover a lot of the basics on how to automate web browser in C#. From downloading the driver, to installing the much-needed Selenium API. So, stay tuned, there is a lot of ground to cover.
How to automate web browser in C#
First things first. In order to programmatically automate our web browser, we need to download the appropriate driver. In this C# tutorial I will show you how to do it using Microsoft Edge. Of course, you can do it with other browsers as well. The choice is yours. Here is a list from where you can download the driver you want to work with:
- Driver for Chrome Web Browser
- Driver for FireFox Web Browser
- Driver for Microsoft Edge Web Browser
- Driver for Opera Web Browser
Download Microsoft Edge Driver
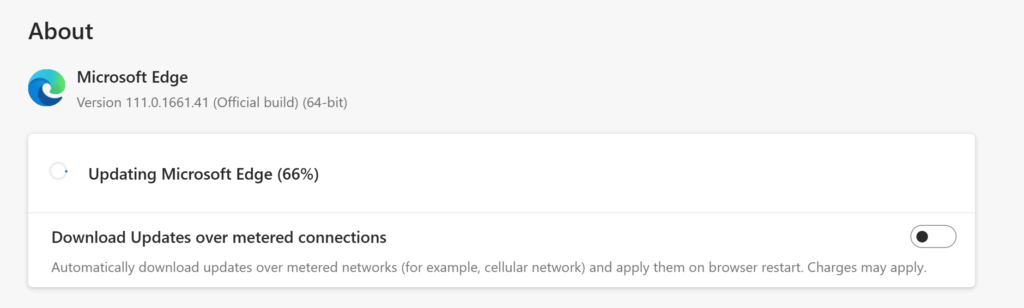
- Open Microsoft Edge and in the URL bar paste the following: edge://settings/help. This will show us the version of the browser we are running. We need this information because we need to download the appropriate driver version. So, make a note of the version number. As you can see, I am running Version: 111.0.1661.41 (64 bit)
- Next, open the following link. It will guide you to the official page of the Microsoft Edge Web Driver. In most cases what you want to do is glance at the Get Latest Version section and focus on the Stable Channel. As you can see from the image bellow my version of Edge matches the latest driver version.
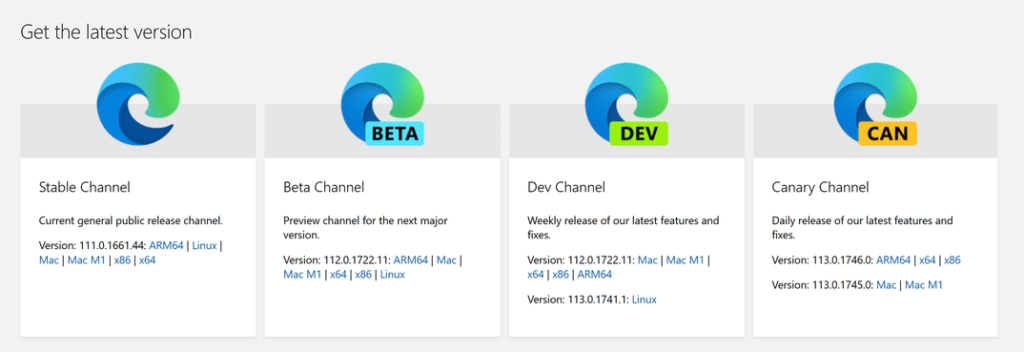
- In the Get the latest version section of the page, select a platform that matches your version number of Microsoft Edge. For me that would be x64. Once you download the zip file, you need to extract it. We are going to be using the msedgedriver.exe in our project. So, make a note of its location.
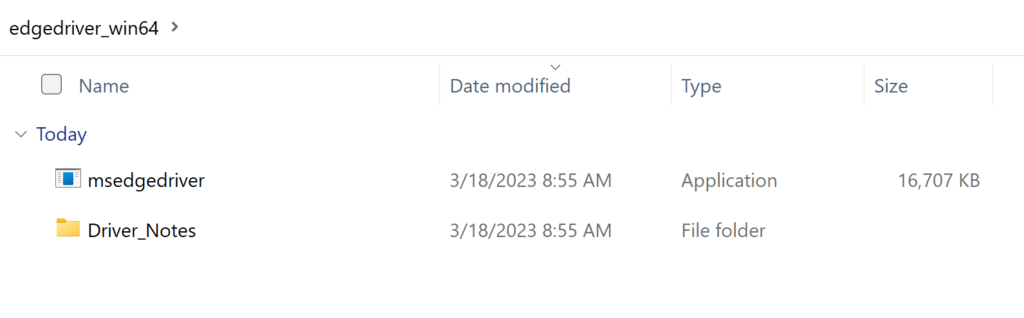
After the Web Driver extraction we are ready to start learning how to automate web browser in C#
Automate Microsoft Edge using C#
In our demo project we are going to be building a simple console application in C#. There are many examples of how to do just that, so I am going to skip that part. In case you need a reminder of how to create a .NET Console C# Application, here is a good tutorial.
Create a .NET console application using Visual Studio – .NET | Microsoft Learn
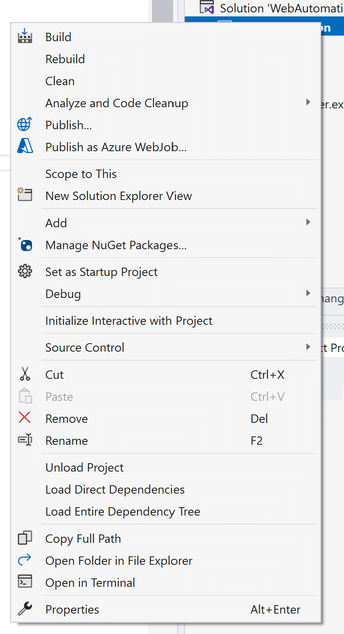
Once you have your Console Application created, we are going to add the Microsoft Edge Driver to our project. To do that, you need to: right click on the project, select Add and in the submenu, click on Existing Item… or you can use the shortcut: Ctrl + Alt + A
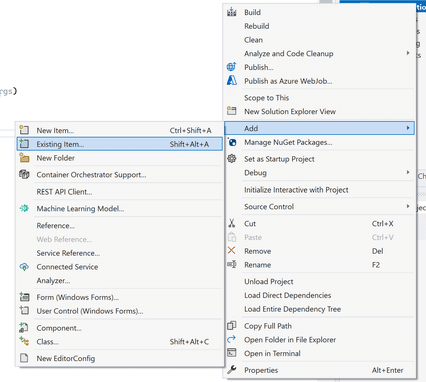
Next, navigate to the folder where you extracted the Microsoft Edge Driver. Select it and click OK. This will add the driver exe to our project.
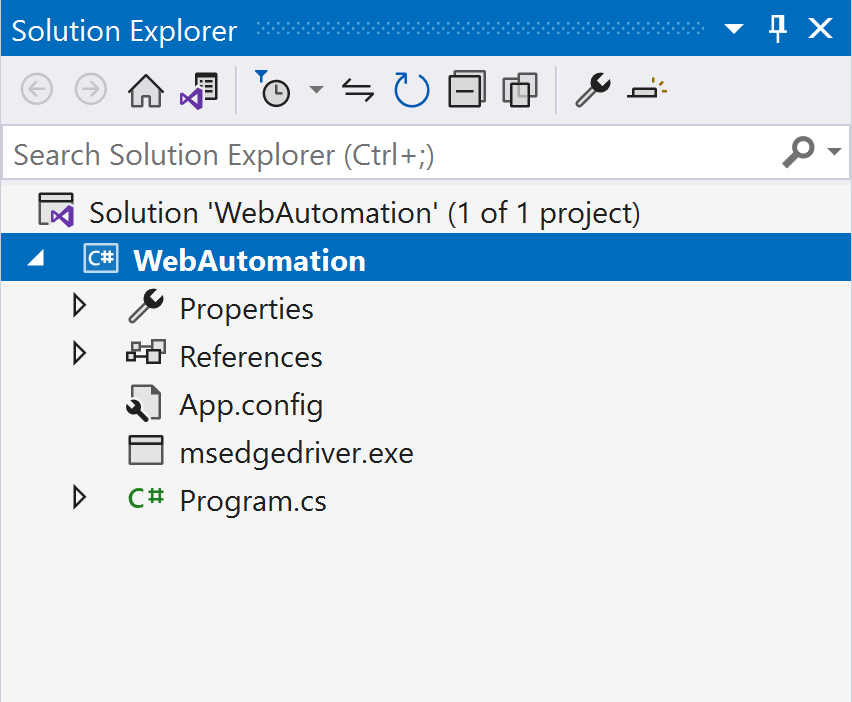
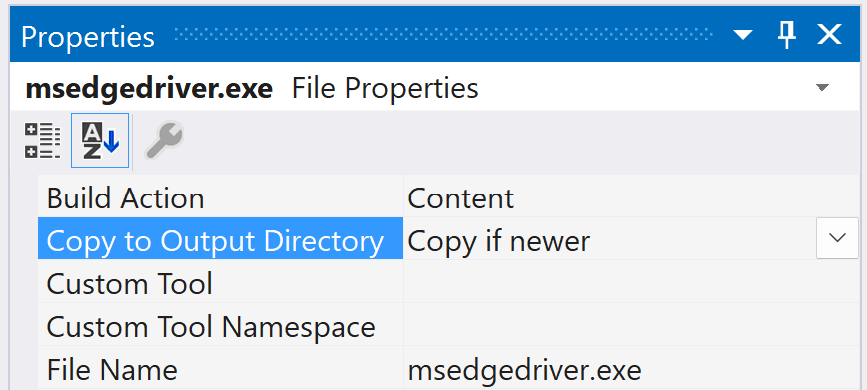
In order for this application to work, we must ensure that the msedgedriver.exe is in the same folder as out Application Console .exe executable file. So, click on the msedgedriver.exe in Solution Explorer and navigate to the Properties window.
There, find the Copy to Output Directory property and set it to: Copy if newer.
If you have any questions so far you can read up on more information about what we did in the following link. Once this is clear, we can proceed to installing a very important package that we need in order to automate web browser in C#.
Download Selenium Web Driver Package
Selenium Web Driver Package is the last thing we need to install for our project. This Selenium package is used to automate Web Browser interaction with C#. Through this API you can access all functionalities of the driver in an intuitive way.
So, let’s see how we can install the package via NuGet Package Manager.
First, right click on your project. In the menu that pops up, click on Manage NuGet Packages.
As a result, a new window will pop up. From there, navigate to the Browse tab and in the search box write: Selenium.WebDriver. The search will yield the following results:
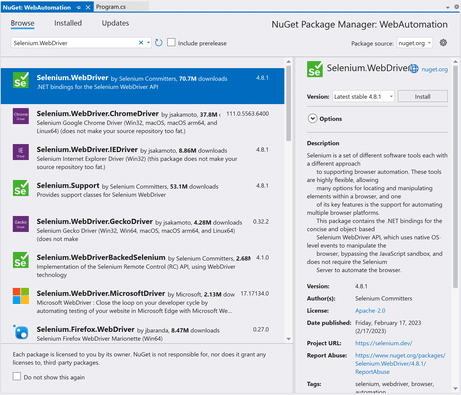
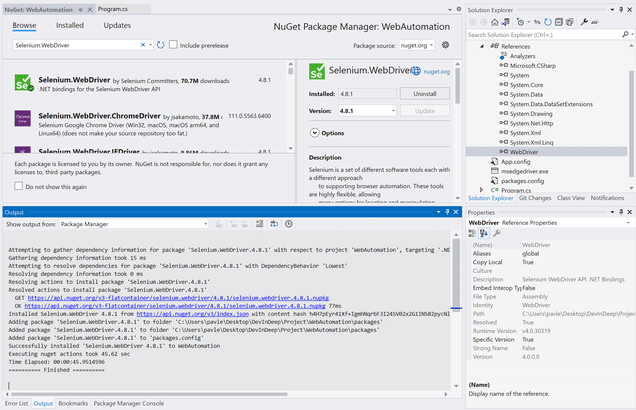
From the list select: Selenium.WebDriver and click the Install button on the right. Visual Studio or rather NPM will download and install the package. Make sure to give VS some time to install all required dependencies.
Once the package is installed, you can verify that WebDriver.dll library is added to your project.
The starting project on how to automate web browser in C# is all set up. We are finally ready to write some code. Let’s dig into it.
Build Web Browser automation tool using C#
First, we will start by creating a new instance of the EdgeDriverService. The way I setup my project allows me to use the default construction method like so:
var deviceDriver = EdgeDriverService.CreateDefaultService();This is because my driver is copied together with my executable .exe file. If your driver is not in the same directory as your exe file, then you might want to use one of the overloaded construction methods. For example, you can explicitly state the path to your Selenium Web Driver. You can get more information about the construction here.
When the default service is launched, a command prompt shows as well. In most scenarios you would like to hide it. You can do that by executing the following line of code.
deviceDriver.HideCommandPromptWindow = true;There is also a class that allows us to manage options specific to the Microsoft Edge Web Browser Driver. In my example I want to hide an annoying message once Edge starts the automation session. For that purpose, I create a new instance of the class EdgeOptions.
EdgeOptions options = new EdgeOptions();
options.AddArguments("--disable-infobars");

driver = new EdgeDriver(deviceDriver, options);
The –disable-infobars argument is provided just as an example. Usually, once the web browser session starts you can get some annoying information messages by the driver. This should suppress them.
Next, I would like to play a little bit with the Microsoft Edge window. I can do that with the following C# code
driver.Manage().Window.Maximize();The first statement maximizes the web browser window. But you can explicitly set the size as well. Let’s take a look at the following C# code.
driver.Manage().Window.Size = new System.Drawing.Size(300, 1080);There is an option to minimize the window as well. We do it like so:
driver.Manage().Window.Minimize();I would recommend playing with these settings. Explore and choose the right option for your C# project.
Automate Web Browser in C#: Timeouts
Sometimes, a web page might take a while to respond. Or it takes too long to load. In such cases, it is essential to mention the wait time for the page load to avoid test case failure. In situations like these, timeouts play a crucial role. They are used to set an interval between actions performed on the test.
driver.Manage().Timeouts().ImplicitWait = TimeSpan.FromSeconds(30);This C# code tells our driver to wait for a maximum of 30 seconds before it gives up executing the command. If this timeout is not set, a non-responsive page would block your app indefinitely.
Automate Web Browser in C#: Navigation
Navigation is crucial if we want to automate web browser in C#. There are two ways you can do this. By simply setting the URL property of the driver or calling the GoToUrl method. Under the hood the GoToUrl method sets the URL property, but it is more flexible since it can accept a string or Uri parameter.
Let’s navigate to this page: www.devindeep.com. This is our starting point. The way we are going to learn how to automate web browser in C# is by learning the most basic commands first. Such is navigation.
driver.Navigate().GoToUrl("https://devindeep.com/");or if you want to use the URL property you can do it by typing
driver.Url = "https://devindeep.com/";And one more important thing I want to mention is the ability to refresh a page. You can make the Web Browser refresh a page with the following C# code
driver.Navigate().Refresh();Of course, you can navigate back and forward by using the: Back and Forward methods. Here is the listing of all navigation methods that the Selenium driver offers:
- GoToUrl
- Back
- Forward
- Refresh
Element Locator using Selenium Web Driver in C#
Once we navigate to a certain page, we can start element manipulation. Web Element is the highest abstraction that Selenium Web Driver offers. It allows the user to identify and work with the element objects located in the DOM (Document Object Model).
The majority of most people’s Selenium code involves working with web elements. So, let’s see what we can do with that. Once, the DOM is loaded we can start executing code. Usually everything starts by looking up an element on the web page.
For that, we can use Locator Strategies. Here is a table that shows us how we can identify elements on a page:
| Locator | Description |
|---|---|
| class name | Locates elements whose class name contains the search value (compound class names are not permitted) |
| css selector | Locates elements matching a CSS selector |
| id | Locates elements whose ID attribute matches the search value |
| name | Locates elements whose NAME attribute matches the search value |
| link text | Locates anchor elements whose visible text matches the search value |
| partial link text | Locates anchor elements whose visible text contains the search value. If multiple elements are matching, only the first one will be selected. |
| tag name | Locates elements whose tag name matches the search value |
| xpath | Locates elements matching an XPath expression |
How to Locate HTML Web Element using Selenium and C#
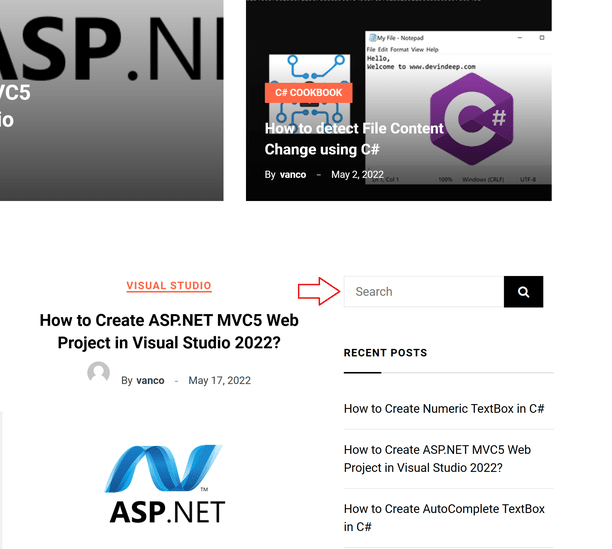
One of the goals for this tutorial (how to automate web browser in C#) is to search for an article on devindeep.com. This means that I have to find the search field, enter text into it and click on the search button (or submit the search form). Let’s investigate the field we want to interact with.
Here is the HTML code for this element:
<label class="label-search">
   <span class="screen-reader-text">Search for:</span>
   <input type="search" class="search-field" placeholder="Search" value="" name="s" title="Search for:">
</label>
There are many ways how we can identify this element in our web page. I prefer to use XPath, and here is the C# code listing for the selection.
var inputBox = driver.FindElement(By.XPath("//*[@id=\"search-2\"]/form/label/input"));I will show you in another tutorial how this XPath came to be. For now, if you analyze it, you will conclude that it uniquely describes the element we want to interact with. And this is very important. We need to make sure we are selecting a single element.
Of course, we can also select multiple HTML elements as well, and we will see how to do that later. But, right now all I need is the search box placed on the web site.
Whenever you are looking for an element on a web site, make sure you are selecting it by something unique. For example, it can be an: id, name or class name, CSS or tag name.
Having that in mind, we can also use the following code to locate the search text box:
var inputBox = driver.FindElement(By.Name("s"));var inputBox = driver.FindElement(By.ClassName("search-field"));All of these C# implementations should yield the same result. They will return an IWebElement.
Interacting with Web Elements using Selenium Web Driver and C#
IWebElement is a selenium class which represents an HTML element (body, table, tr, etc.) on a page in your selenium automation code. With the IWebElement instance, you can interact with an element, retrieve it’s attributes and properties.
There are only 5 basic commands that can be executed on an element:
- click is an operation that can be executed on any element.
- send keys is an operation that can be applied on text fields or for that matter, any content editable elements.
- clear applies to text fields and content editable elements. Same as send_keys except that it clears out the text from the field.
- submit only applies to form elements.
- select applies to option elements. Combo box for example where you want to select a single value.
The variable inputBox holds a reference to the HTML Search TextBox element we were looking for. Now, we can interact with it. We want to place a text inside. Let’s say we want to search for ML.NET tutorials.
We have to execute the following C# code
inputBox.SendKeys("ML.NET");This method simulates the action of typing into the text field. Here is the list of all valid keys you can send. Once the text is entered we should be able to click on the Search button. This button is placed right next to the search box. But, before we interact with the element, we need to locate it.
var searchButton = driver.FindElement(By.XPath("//*[@id=\"search-2\"]/form/button[1]"));After we have successfully found the element, we can interact with it. Since this is a button, we should click it. Here is the C# code listing for this action
searchButton.Click();The waiting game
Imagine you have a bad connection. Or for some reason the web site takes too long to respond. You need somehow to handle such scenario. This is because if you try to interact with a web element and the web site is not loaded, you will face an exception.
Even the previous commands are somewhat prone to this type of error. Since this is just a demo – a tutorial, we are not going to go over every single C# statement and secure it. It doesn’t make sense, but in your project make sure you do the right thing.
Please note that the Selenium Web Browser session is launched via the exe driver we installed earlier. As a result, it will execute in a different process. This is great news for us. While the browser is loading the page, we can halt our executing thread until the web site is loaded completely.
I am telling you this because we just hit the search button. if this was a big blog, the server might take a while to return some results. Consequently, we would have to wait. We wait by suspending the currently executing thread with the following C# statement.
Automate Web Browser in C#: Wait for the web page to load
Thread.Sleep(2000);You can read more about this statement on the .NET documentation page. But what this basically do is wait for 2000 ms (2 seconds) and then the thread will continue execution. So how did I select this number? Well, it’s arbitrary. I think that for my blog 2 seconds is long enough before the server returns some results.
Waiting for a page to load, or waiting for an element to become visible is a huge deal when you are working to automate web browser in C#. Now, this is the most basic implementation. In the future we will look at some more advanced ways how to handle this scenario. I think it deserves its own blog post. But for now, this will do.
Retrieve Data from a Web Site
Up until now we interacted with the page by sending commands to HTML elements. Let’s make this more interesting and parse the search results into our command prompt application.
This is how the search results look like

Right now, we can see the web page structure in the browser. But let’s examine the HTML code as well. It should tell us how the search result articles are structured in code. The article tag is a little bit complicated but nevertheless, we should examine it.
Automate Web Browser in C#: Analize the HTML closely.
<article id="post-3259" class="post-3259 post type-post status-publish format-standard has-post-thumbnail hentry category-ml-net tag-data-transformation tag-ml-net tag-preprocessing tag-tutorial">
<div class="coblog-post-thumbnail">
<a href="https://devindeep.com/how-to-preprocess-data-using-ml-net/" aria-hidden="true" tabindex="-1">
<img width="960" height="600" src="https://devindeep.com/wp-content/uploads/2021/04/Data-Preprocessing-960x600.jpg" class="attachment-coblog-1140-600 size-coblog-1140-600 wp-post-image" alt="How to preprocess data using ML.NET" decoding="async"> </a>
</div>
<header class="coblog-entry-header">
<h2 class="coblog-entry-title"><a href="https://devindeep.com/how-to-preprocess-data-using-ml-net/" rel="bookmark">How to preprocess data using ML.NET</a></h2> <div class="coblog-entry-meta">
<span class="coblog-meta-img"><a href="https://devindeep.com/author/vanco/"><img src="https://secure.gravatar.com/avatar/85f760256c45bfb6d69e32b54190f89d?s=96&d=mm&r=g" alt="image"></a></span><span class="coblog-meta-author">By<a href="https://devindeep.com/author/vanco/">vanco</a></span><span class="coblog-meta-date"><a href="https://devindeep.com/how-to-preprocess-data-using-ml-net/" rel="bookmark">April 22, 2021</a></span> </div><!-- .coblog-entry-meta -->
</header><!-- .coblog-entry-header -->
<div class="entry-content">
Today we will talk about the significance of data handling. We will see how to preprocess data using ML.NET framework. Data Preprocessing is one of the most important and difficult steps in machine learning project. But ML.NET provides various ways to handle messy data out <p class="coblog-btn-post"><a class="coblog-btn-common coblog-btn-primary" href="https://devindeep.com/how-to-preprocess-data-using-ml-net/">Read More</a></p> </div><!-- .entry-content -->
</article>If you look closely at the HTML code presented, you can spot that the title of the article is placed inside the header tag, neatly tucked under an h2 tag like so:
<h2 class="coblog-entry-title">
     <a href="https://devindeep.com/how-to-preprocess-data-using-ml-net/" rel="bookmark">How to preprocess data using ML.NET</a>
</h2>
It seems like this section of the code has everything we need. We want to display the title and grab the link leading to the tutorial. In this demo application build to automate web browser in C# we only need those two exact things. Title of the article and the URL that leads to it.
Please note that the web page will render multiple articles. We want to scrape them all. So, we are going to be using the following C# code:
var searchArticles = driver.FindElements(By.TagName("article"));This code will return a ReadOnlyCollection of IWebElement. Or in plain words, the HTML articles.
Next, I want to store the results in a List. I will display the header and save the link to the article. This is done with the following C# implementation.
var urls = new List<string>();
for(int i=0;i<searchArticles.Count;i++)
{
     var header = searchArticles[i].FindElement(By.XPath(".//h2/a"));
     var hrefAttribute = header.GetAttribute("href");
     Console.WriteLine($"{i+1}: {header.Text}");
     urls.Add(hrefAttribute);
 }
So far, so good. As you can see, we are “drilling” inside the article element. Since we want to get the URL of the article, we need to look into the <h2> tag which contains <a> tag which hosts href attribute. This is great, because now we can learn how to get the value out of an attribute.
GetAttribute() method in Selenium
We do that by executing GetAttribute function. Attributes are additional bits of information developers include in HTML tags. They are usually used when you want to define a characteristic of an HTML element. They are usually represented by a “name-value” pairs. For example
<img src="img_girl.jpg" alt="Girl in a jacket" width="500" height="600">This img tag contains several “name-value” pairs of attributes. This tag is used to embed an image into an HTML page. The attribute src specifies the path to the image and alt specifies the alternative text to be displayed if for some reason the image cannot be loaded. width and height are pretty self-explanatory attributes.
On the other hand, the href attribute hosted by the <a> tag, specifies the URL of the page the link goes to. We need that information for a later use, so we add it to a collection.
Automate Web Browser in C# via Command Prompt
So far, we have seen how to interact with the Web Browser via code. Let’s go one step further and show how can a user take over the interaction. Basically, we are going to let the user choose where to go based on the input he provides.
Here is the C# code listing.
Console.WriteLine($"Pick article from 1 to {urls.Count}");Note: This is not a good way to deal with this scenario. Please note this is only for demonstration purposes only.
var userInput = Console.ReadLine();
if (Int32.TryParse(userInput, out int urlIndex))
     driver.Navigate().GoToUrl(urls[urlIndex-1]);
First, we will read a number between 1 and the number of search results we got from the web page. If we are able to parse the input as a number, we will try to get the URL the user wants to go based off of the collection we build up earlier. Then we simply navigate to that page.
How to automate web browser in C#: Full Code Listing
EdgeDriver driver = null;
try
{
     var deviceDriver = EdgeDriverService.CreateDefaultService();
     deviceDriver.HideCommandPromptWindow = true;
     EdgeOptions options = new EdgeOptions();
     options.AddArguments("--disable-infobars");

     driver = new EdgeDriver(deviceDriver, options);
     driver.Manage().Window.Maximize();

     driver.Manage().Timeouts().ImplicitWait = TimeSpan.FromSeconds(30);

     driver.Navigate().GoToUrl("https://devindeep.com/");
     var inputBox = driver.FindElement(By.XPath("//*[@id=\"search-2\"]/form/label/input"));
     inputBox.SendKeys("ML.NET");
     var searchButton = driver.FindElement(By.XPath("//*[@id=\"search-2\"]/form/button[1]"));
     searchButton.Click();
     Thread.Sleep(2000);
     var searchArticles = driver.FindElements(By.TagName("article"));
     var urls = new List<string>();
     for(int i=0;i<searchArticles.Count;i++)
     {
          var header = searchArticles[i].FindElement(By.XPath(".//h2/a"));
          var hrefAttribute = header.GetAttribute("href");
          Console.WriteLine($"{i+1}: {header.Text}");
          urls.Add(hrefAttribute);
     }
     Console.WriteLine($"Pick article from 1 to {urls.Count}");
     var userInput = Console.ReadLine();
     if (Int32.TryParse(userInput, out int urlIndex))
     {
          driver.Navigate().GoToUrl(urls[urlIndex-1]);
     }

     Console.ReadLine();
}
catch(Exception ex)
{
     Console.WriteLine(ex.Message);
     Console.ReadLine();
}
finally
{
     driver.Quit();
}
Before going away check out some of our other articles:
- Learn how to code a Neural Network in C#
- Create Face Mask Detection system using Model Builder and C#
- Create Text Detection Algorithm in C#
Conclusion: How to automate web browser in C#
Automated testing is almost mandatory to guarantee the stability of an application. Developers use this principle to test their UI/UX workflows on a daily basis. But this process is more powerful and used in many different varieties of applications.
Many web actions can be automated. For example: filling out forms and fields, scraping content from a web page, extracting and transferring data between applications etc. I personally use this method to automate cache cleaning on my web site. Since my WordPress caching plugin doesn’t have an API to which I can connect and clear cache, I used web browser automation to do just that.
That little tool that saved me a lot of time inspired this article. I am sure you will find other usage as well.
Please note that this is only the beginning. There is plenty more stuff we can learn about Selenium and C# but this post is already long enough. I am sure, there will be part 2 of “How to automate web browser in C#”, so keep checking in.
Hope you found this post helpful. If you have any questions regarding this topic, feel free to mail us at info@devindeep.com