

Hey guys, in this article we are going to learn how to create round corner controls in WinForms C#.
How to create Round Corner Control in WinForms C# – Source Code
Windows Forms and Round Corner Controls
WinForms is a UI framework for building Windows Desktop Applications. The initial release of this framework was 21 years ago, and not much has changed. Well, at least not on the most basic level.
One of the most interesting things to note, is that after 21 years of existence, WinForms has not graced us with rounded edges for the controls it provides. Just as a comparison, WPF has this feature implemented right out of the box. As a result, when you need a feature like this I would recommend you to use WPF.
But there are still legacy projects out there. What if you are in a situation where you need to create a Round Corners for your controls? Well, you are in luck, because we are going to extensively cover how to do that with any basic WinForms control.
Although C# is our language of choice, you can easily do this using Visual Basic as well.
So, what do we mean when we say Rounded Corners Control?
We refer to a control that is rectangular in shape and have rounded corners, or in other words, the corners do not form a sharp point, but instead they are curved into an arc. Visually it looks and feels better. Especially for buttons. So, in this tutorial we will learn how to create round corner controls in WinForms using C#.
What are we going to build
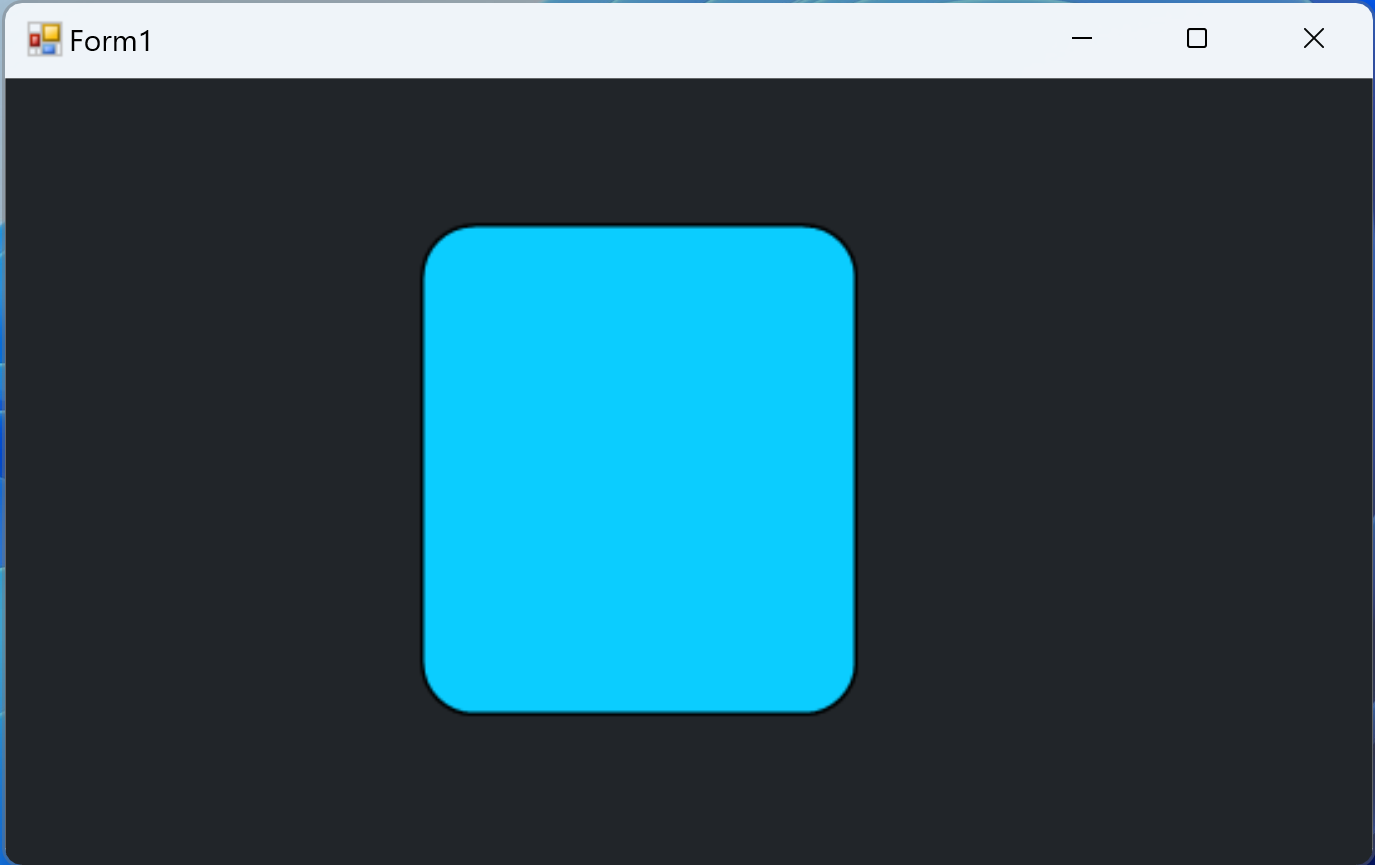
As you can see, we are going to start building the base. First, we will create a rounded user control. Then we will use this as the base for everything else. The possibilities are endless. Please note, that we are not going to take the easy route. In this tutorial on how to create Round Corner Controls in WinForms C# we will override how a control is painted on a window. Once we take control over the pain method, you will be surprised by all the possibilities WinForms has to offer.
Although, you might find other easier solutions for this problem, I think that this is the safest and the best approach. At the beginning, the code might look intimidating but just bear with me. I will provide you with a graphics extension class that you can use for your projects. As a result, you will only need to focus on designing the look and feel of your WinForms custom controls.
So, let’s start building our base.
Round Corner Controls in WinForms C#
If you want to follow this tutorial, you need to create a new Windows Forms project. Before we start, there is one very important thing I need you to do. And that is to import the Graphics class extension methods.
The Graphics class provides methods for drawing objects to the display device. If you have never used this class it would be beneficial to look at some tutorials first. For example, take a look at how to create graphics objects for drawing. Next, see how you can draw a fill rectangle on a Windows form.
Once you are comfortable with the basics of the Graphics class, you should know that you can obtain a Graphics object by calling the Control.CreateGraphics method on an object that inherits from System.Windows.Forms.Control. This class defines the base class for controls, which are components with visual representation.
More on DevInDeep
- Create Face Mask Detection in C#
- Implement Text Detection from image in C#
- Create Handwritten Digit Recognition Application in C#
And there is one more way we can get to the Graphics class. That is by handling the control’s Control.Paint event. If you look at the definition of this method, you will notice it provides PaintEventArgs class. This class carries the Graphics property. And this is exactly what we are after.
Now, let’s break down all this information into something more useful to us. We want to create Round Corner Controls. Because .NET and WinForms doesn’t provide us with a way to do this, we will need to create our own. To do that, we need to draw how we want our control to look like. As a result, we are going to be using the second method for creating round corners. And that is by handling the Paint event.
The Paint Event
Every single Windows Forms control inherits from the base class Control. As a result, this base class provides drawing functionality via its Paint event. The Paint event is raised when the control is redrawn. As you can imagine, this happens quite often. When you drop the control onto the Windows form, this event will be raised. Many other actions can cause the same. For example, when you minimize/maximize the window, move and resize the control and so on.
But you can also make the control redraw itself as well. We will see that in just a moment.
How to code Round Corner Controls in WinForms C#
If you already have your empty Windows Forms project ready, you can start by importing the Graphics class extension methods. These methods are nothing more than drawing a round edges on the rectangle. I would advise you to look at how to draw rectangle and then investigate the code for drawing a rounded edge.
This class is a little bit too big to share it as a C# code listing. You can download my project and expand the Extensions folder and look into GraphicsExtension.cs class. I am guessing you know what an extension method is by now. But in case you don’t, extension methods enable you to “add” methods to existing types without creating a new derived type, recompiling, or otherwise modifying the original type.
In other words, these custom methods will now be part of our Graphics object.
Create Round Corner User Control
We are at a point where we have the knowledge to create the base control for our custom rounded corner controls. So, let’s create our User Control.
Right click on your project then navigate to Add and in the sub-menu look for New Item. Click on it.
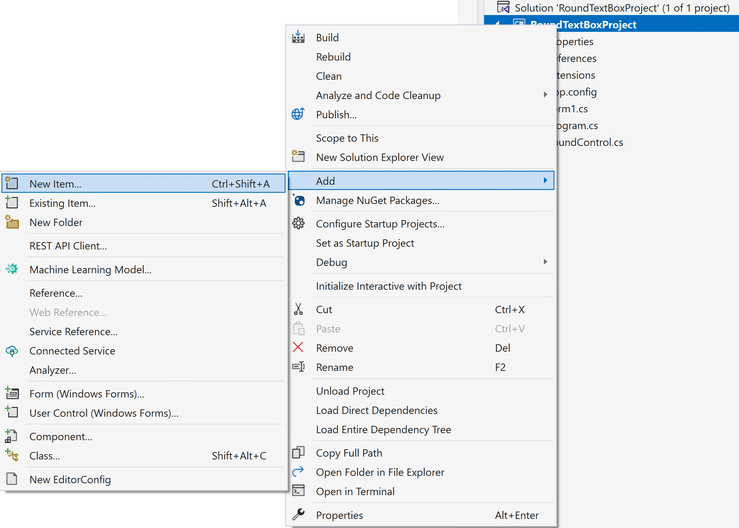
As a result of your action a new window will pop up.
More on DevInDeep
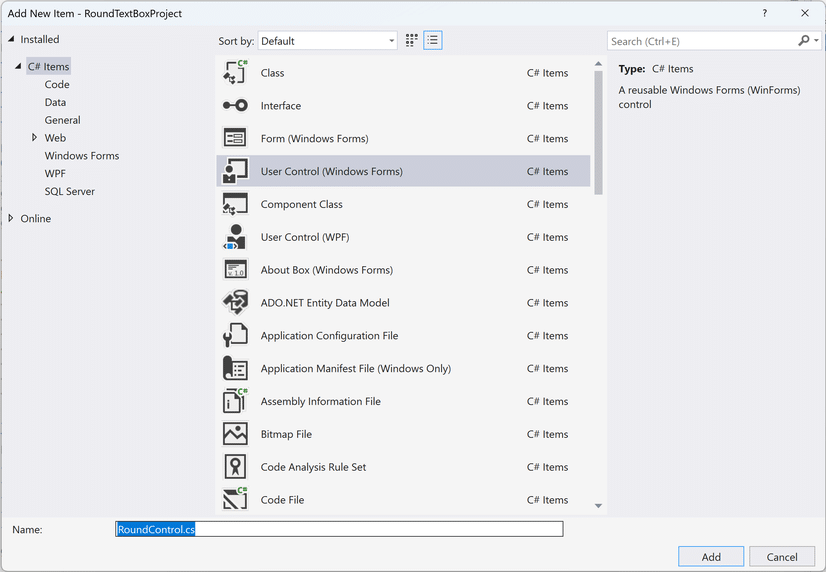
In this window you want to select User control (Windows Forms), name it RoundControl and click Add. This will do it. We just took the first step of the tutorial on how to create Round Corner Controls in WinForms C#. Now, let’s write some C# code.
What you need to do next is to navigate to the C# code file. You can select the newly created user control and press F7 on your keyboard. This action will open up a new window with the code file for your round corner user control.
Before going further please include the following using statements at the beginning of the file.
using RoundTextBoxProject.Extensions;
using System.Drawing;
using System.Drawing.Drawing2D;
using System.Windows.Forms;
Please note that the first using statement is including the namespace for the extension methods of the Graphics class. Depending on how you have set up your project, this line may be different for you.
Now let’s add a couple of properties.
Rounded Corner Radius
private int _radius = 10;
public int Radius
{
     get { return _radius; }
     set
     {
          _radius = value;
          Invalidate();
     }
}
In order to draw the arc of the rounded corner we need to set the radius. This defines the degree the corner of the control is rounded.
Rounded Control Background Color
private SolidBrush _backgroundBrush = new SolidBrush(SystemColors.Control);
private Color _backgroundColor = SystemColors.Control;
public Color BackgroundColor
{
     get { return _backgroundColor; }
     set
     {
          _backgroundBrush = new SolidBrush(_backgroundColor = value);
          Invalidate();
     }
}
We need to set up the background for the custom control. Thus, we define a new property called BackgroundColor. This may come a little bit weird to you since we have the BackColor property as well. Why not override it? Well, the background property will color the full control. And BackgroundColor will fill the rectangle inside the control we are going to draw.
Usually, you will set the BackColor property to Transparent (if possible) or the color of your Windows Form. We will take a close look at this in just a moment. For now, let’s leave it at that.
Rounded Control Border Color
private Color _borderColor = SystemColors.Control;
private Pen _borderPen = new Pen(ControlPaint.Light(SystemColors.Control, 0.0f), 0);
public Color BorderColor
{
     get { return _borderColor; }
     set
     {
          _borderColor = value;
          _borderPen = new Pen(ControlPaint.Light(_borderColor, 0.0f), _borderWidth);
          Invalidate();
     }
}
As part of this project, I decided to include a Border as well. The control looks nicer when a border is included.
Rounded Control Border Width
private float _borderWidth = 1.0f;
public float BorderWidth
{
     get { return _borderWidth; }
     set
     {
          _borderWidth = value;
          _borderPen = new Pen(ControlPaint.Light(_borderColor, 0.0f), _borderWidth);
          Invalidate();
     }
}
Since we already have a BorderColor property, why not include a BorderWidth as well. The name explains itself, there is nothing more to converse about the width of the border. We will see it in action soon enough.
There are two classes that we have not discussed. Those are SolidBrush and Pen class.
- Solid Brush: Defines a brush of a single color. Brushes are used to fill graphics shapes, such as rectangles, ellipses, pies, polygons, and paths.
- Pen: Defines an object used to draw lines and curves.
As you can see, we use the brush to fill a rectangle with a single color and the pen class to draw the border around the rectangle.
You may have noticed that after each change of the property we call the Invalidate method. We inherit this method from the Control class, which as you remember is the base for our custom control. Calling this method causes a paint message to be sent to the control. As a result, OnPaint will be raised.
But before we raise OnPaint let’s create two more helper methods.
Draw the Round Corner Control in WinForms C#
Because we have all the properties we need, we can finally draw the rounded rectangle on the control. Take a look at the following C# code listing.
private void drawBorder(Graphics g) =>
            g.DrawRoundedRectangle(_borderPen, 10, 10, Width - 20, Height - 20, _radius);

private void drawBackground(Graphics g) =>
            g.FillRoundedRectangle(_backgroundBrush, 10, 10, Width - 20, Height - 20, _radius);
The first method draws the border. The border line starts at (10,10) position point inside the control and ends at (width-20, height-20). This defines a rectangle with start position and its width and height. But see, because we are using the pen to draw it, it will only draw the border or rather the line that follows the rectangular shape. We also provide the radius. The radius controls the arc of the border line. You can play with these variables to see which ones are best suited for your solution. Maybe you can even expose them as a control’s properties? It is up to you.
The second method draws a fill rectangle with rounded corners. This method in turn will draw a rectangle filled with the specified background color. This function also accepts a radius as well. Since I want the border and the rectangle to blend in seamlessly, I use the same radius for the both of them. Play around with this argument and see how it affects the drawing.
Paint the Round Corner Control
Finally, we are able to paint the control using the following C# code.
protected override void OnPaint(PaintEventArgs e)
{
     Graphics g = e.Graphics;
     g.SmoothingMode = SmoothingMode.AntiAlias;
     drawBorder(g);
     drawBackground(g);
}
As you can see, we are overriding the OnPaint method. This method is called every time there is some kind of visual update to the form or the control.
First, we obtain the Graphics object. Then we set the SmoothingMode. Since we want our control to look it’s best, we need to set the mode to AntiAlias. Same as HighQuality they specify rendering mode with smoothing applied.
Next, we draw the border and the background.
That’s it.
How to create Round Corner Controls in WinForms C#: Conclusion
I hope you enjoyed this tutorial. Like i said, this is only the beginning. Next, we will focus on creating a round corner TextBox and round corner Button using C# and WinForms UI framework.