
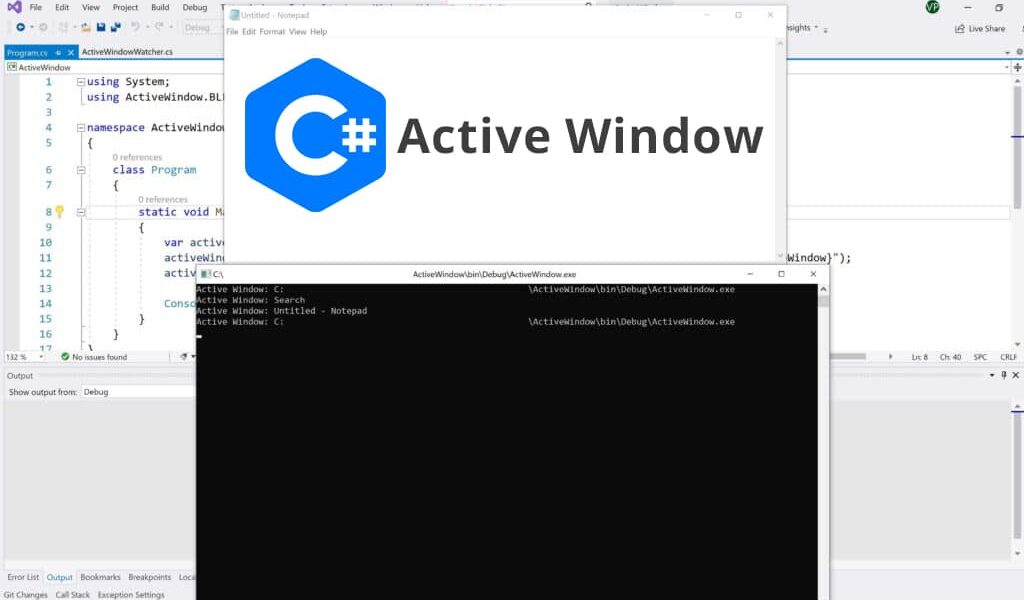
In this guide we will demonstrate how to get Active Window using C#.
Full Source Code is available at:
DevInDeep/ActiveWindow (github.com)
Active Window
Opening different applications leads to many windows showing up. But, there can be only one active window at a time. An active window is a pop up window. One that currently holds the keyboard focus.
Take for example the Virtual Keyboard application that ships with Windows. You can activate it by navigating to the Start menu. Then, select Settings -> Accessibility -> Keyboard. Once you see the keyboard options, at the top of the window there is Use the On-Screen Keyboard button. If you click on it, you will activate the Windows On-Screen Keyboard. The keyboard will remain on the screen until you close it.
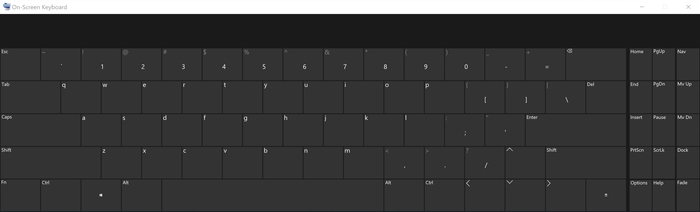
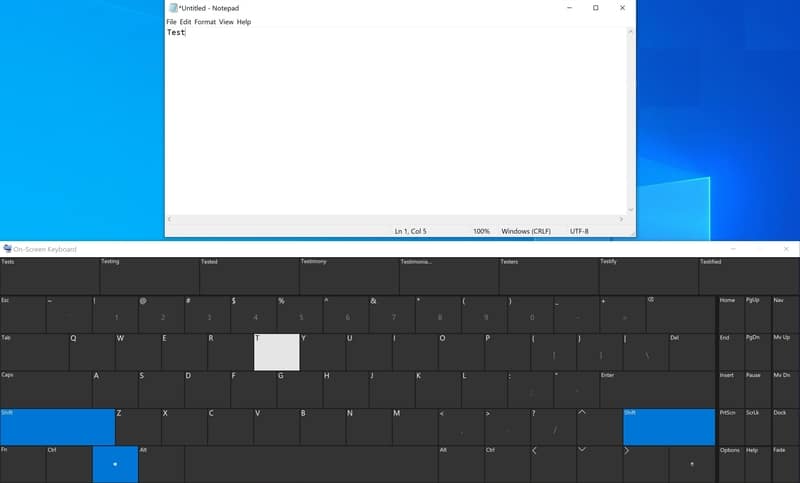
Although this is a separate application, this virtual keyboard can send keys to the currently active window. So, whichever window holds the current keyboard focus, it will receive the key codes from the On-Screen Keyboard.
Eventually, we are going to build up an application that can be used as a virtual keyboard. But first, we must split this project into multiple different modules. As a result, we will have multiple different posts leading us to the end goal.
The first concern that we are going to address today is how to get active window using C#. Once we have the active window handle, then we can actually send some key codes to that window.
Windows API
As you have probably guessed it by now, we will use the native Windows API. Remember, out task is to get the current active window. In order to do that we must communicate with the Windows OS. This operating system has a core set of application programming interfaces (APIs) available. Those allow a user-written program to interact with Windows.
For example display things on screen, get input from mouse and keyboard. The Windows API contains thousands of functions, structures and constant that you can declare and use in your program. However, those functions are written in C programming language. Therefore, they must be declared before being used.
Windows 32 API
The Windows 32 API is created for 32-bit processors and relies on 32 bit values. It is portable to any operating system, a wide range of processors and is of a platform independent nature. What is characteristic about that API is that it has the 32 prefix after the library name.
All APIs are implemented using 3 libraries:
- Kernel
- User
- GDI
In this tutorial we will be using the User library. Or to be more precise the “USER32.dll” in Win32. This allows managing entire user interfaces such as: Windows, Menus, Dialog Boxes, Icons etc.
So, the first thing we need to do is import and declare the methods we are going to use.
Import and Declare Win32 methods
In your C# project add a new class. Call it WindowAPI.cs. This class will import and declare the native Window API related methods we are going to use in our project.
Inside the class write the following C# code:
[DllImport("user32.dll")]
private static extern IntPtr GetForegroundWindow();

[DllImport("user32.dll")]
private static extern int GetWindowText(IntPtr hWnd, StringBuilder text, int count);
Let’s go over the two Win32 API methods that we are using:
GetForegroundWindow
This method retrieves a handle to the foreground window (the window with which the user is currently working). You can check the complete documentation here. The method returns an IntPtr struct as a handle to the foreground window. This in turn, will get us the current active window.
GetWindowText
The handle is only a pointer to the window. We want to display the title of the currently active window. So, we need the title bar text. GetWindowText copies the text of the specified window’s title bar (if it has one) into a buffer.
As you can see the method accepts a handle to the window from which we want to extract the title bar text. You can review the documentation in more detail here.
More DevInDeep Tutorials:
- Introduction to Machine Learning in C# with ML.NET
- Face Mask Detection using Model Builder and C#
- How to implement Text Detection in C#
Get Active Window
Now that we have all we need, we are ready to implement our own method. Let’s call it GetActiveWindowTitle(). This is the source C# code for it.
public static Option<ActiveWindowModel> GetActiveWindowTitle()
{
      const int nChars = 256;
      StringBuilder Buff = new StringBuilder(nChars);
      IntPtr handle = GetForegroundWindow();

      if (GetWindowText(handle, Buff, nChars) > 0)
           return Option<ActiveWindowModel>.Some(ActiveWindowModel.Create(handle,Buff.ToString()));

      return Option<ActiveWindowModel>.None();
}
First, we need to obtain the active window handle. We do that by calling GetForegroundWindow which returns exactly what we need. The second part of the code tries to get the title bar text of the window. If the window handle points to an actual window, and its title bar text can be obtained, we return the result as a ActiveWindowModel class.
Let’s now review the C# code for that class as well
public class ActiveWindowModel
{
        public IntPtr WindowHandle { get; private set; } = IntPtr.Zero;
        public string WindowTitle { get; private set; } = string.Empty;

        private ActiveWindowModel(IntPtr windowHandle, string windowTitle)
        {
            this.WindowHandle = windowHandle;
            this.WindowTitle = windowTitle;
        }

        public void IsDifferentThan(ActiveWindowModel otherActiveWindow, Action onDifferent)
        {
            if (otherActiveWindow.WindowHandle == this.WindowHandle) return;
            onDifferent();
        }

        public static ActiveWindowModel Create(IntPtr windowHandle, string windowTitle) =>
            new ActiveWindowModel(windowHandle, windowTitle);

        public static ActiveWindowModel CreateFrom(ActiveWindowModel activeWindow) =>
            new ActiveWindowModel(activeWindow.WindowHandle, activeWindow.WindowTitle);

        public static ActiveWindowModel CreateEmpty() =>
            new ActiveWindowModel(IntPtr.Zero, string.Empty);
}
This class is holding the information we have retrieved from the Win 32 API call. There is only one behavioral component here. It compares itself to another ActiveWindowModel class to see if both of them are referring to the same window. We will use this logic later.
Option Type
The only type we have to explain is Option<T>. This implementation in C# was actually inspired by its functional counterpart the F# language. F# contains Options.
The option type in F# is used when an actual value might not exist for a named value or variable. An option has an underlying type and can hold a value of that type, or it might not have a value.
Options in F#
So, instead of returning the dreaded null, we will return an Option<ActiveWindowModel>. This way the calling (client code) will not need to do any null checks to see if the object contains value.
If you don’t like this implementation, or you think it is complex, then by all means return only the ActiveWindowModel. Just remember to do null checks before you use it.
Create an Active Window Watcher
Now it is time to put everything together. We will build up an ActiveWindowWatcher class. Behind the class there will be a Timer component. It will be a recurring one. This means that after the interval elapses it will fetch the currently active window information. This information will be published to everyone who is subscribed or listening for a specific event.
Let’s take a look at the C# code
public class ActiveWindowWatcher
{
        private Timer stateTimer;
        private ActiveWindowModel currentActiveWindow = ActiveWindowModel.CreateEmpty();
        public event EventHandler<ActiveWindowChangedEventArgs> ActiveWindowChanged;

        public ActiveWindowWatcher(TimeSpan interval)
        {
            stateTimer = new Timer(interval.TotalMilliseconds);
            stateTimer.Elapsed += (o, e) => GetActiveWindow();
        }

        public void Start() => stateTimer.Start(GetActiveWindow);
        public void Stop() => stateTimer.Stop();

        private void GetActiveWindow()=>
            WindowAPI
                .GetActiveWindowTitle()
                .Do(activeWindow =>
                    activeWindow.IsDifferentThan(currentActiveWindow,()=> {
                        currentActiveWindow = ActiveWindowModel.CreateFrom(activeWindow);
                        ActiveWindowChanged?.Invoke(this, ActiveWindowChangedEventArgs.Create(activeWindow.WindowTitle));
                    }));
}
First, we are declaring three private fields. A Timer, an ActiveWindowModel field to hold the currently active window and EventHandler called ActiveWindowChanged. This event will fire only when a different active window is in focus. As a result, it will notify the calling code of the change. Which is exactly what we want.
The constructor of this class accepts a TimeSpan struct. In order for this class to work properly, it needs to know when to refresh the information on the currently active window. Because there is no method in Windows API that will alert us when the active window changes, we need to create that logic ourselves. Thus, we are implementing it by using a Timer.
Once the Timer elapses it will try to fetch the active window title again. If it is а different one, it will raise the ActiveWindowChanged event. Which in turn will notify the client code of the active window change.
Active Window Watcher API in C#
The public interface of this class consists of two methods. One is called Start and it simply activates the timer. The only thing worth to note here is that I am not using the standard Start method the Timer class provides. I am actually using an overridden version of the method implemented by me.
One of the things I want to happen is to call the GetActiveWindow method once before the timer elapses. This is because I don’t want the user to call the Start method and then nothing happens. For example say the user sets the TimeSpan to activate the timer every 5 seconds. This means that once the user calls the start method, he needs to wait for 5 seconds before the active window information is refreshed. My intention was when the user calls the Start method, it will fetch the currently active window and then do that again once the timer elapses. I think it makes more sense.
The other functional part of the public interface is the Stop method. As the name suggest it simply stops this class from fetching the active window.
Now, let’s get into the most important part of the class. The GetActiveWindow method.
Get Active Window C# Implementation
First of all, we need to invoke the GetActiveWindowTitle method from the WindowAPI class. If you remember, the method returns an Option<T>. This class can either have or don’t have any value. By invoking the method Do on the Option<T> class will make sure that the following code executes only if a valid ActiveWindowModel object is present.
Do is another extension method that works on IEnumerable interface which is implemented by the Option<T> class. You can review the this code and how it works directly from the provided repository.
Now, since the ActiveWindowModel class contains the method IsDifferentThen, we can use it to compare two ActiveWindowModel classes. What we are doing here basically is we are checking to see if the current active window (that we have as a field of the class) is different than the active window the Windows API is providing us with. If they are the same, then we do nothing. But, if they are different we need to notify the client code that has subscribed to the ActiveWindowChanged event.
But, before we notify the client code about the change, we must make sure to store/save the newest active window as well. We do this so that we can do another comparison when the next Timer elapse event occurs.
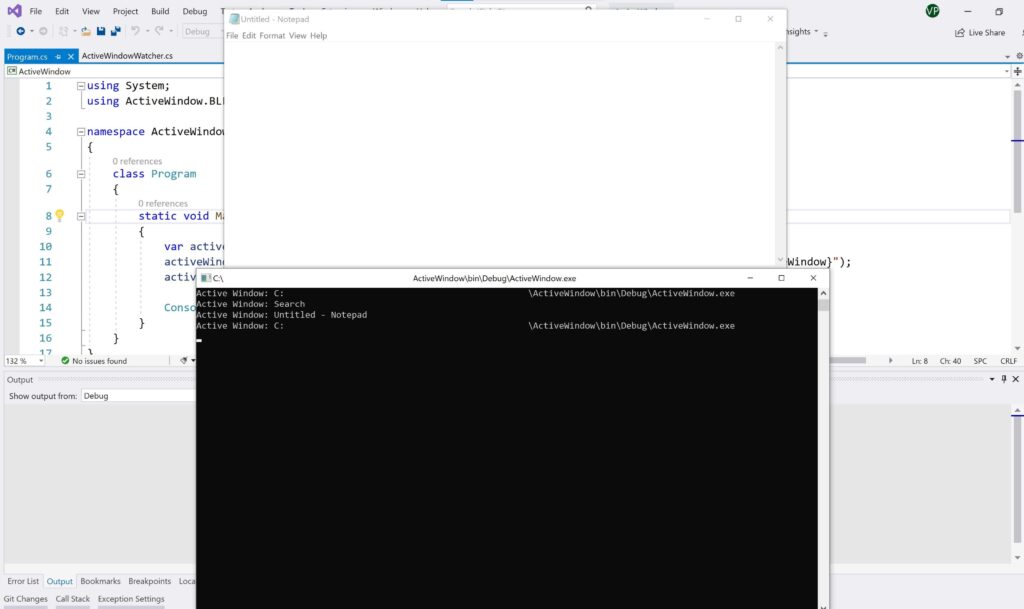
Get Active Window Usage
Because of the way we have designed this class, the usage is quite simple. There is not much to it. Here is the C# client code
var activeWindowWatcher = new ActiveWindowWatcher(TimeSpan.FromMilliseconds(500));
activeWindowWatcher.ActiveWindowChanged += (o, e) => Console.WriteLine($"Active Window: {e.ActiveWindow}");
 activeWindowWatcher.Start();
First, we need to create an instance of the ActiveWindowWatcher class. In the constructor we need to provide a TimeSpan structure to tell the inside Timer how much time it needs to wait before it grabs the new active window.
The second part of this code snippet is the client subscription to the ActiveWindowChanged event. This event is fired when there is a new active window in focus. Currently it only passes the window title to the user, so that we can print the Window title as string to the console.
And finally, the Start method. It is pretty self explanatory. It just starts the whole process.
There you have it. We just built a Active Window Watcher feature for our application. We also learned how to get Active Window using C#.
Next, we will see how we can send commands to the active window. Eventually we will end up with a nice looking and functional Virtual Keyboard. But for now this is it.
Next, take a look at How to Send Keys to Another Application.