This tutorial will cover How to set Extended Window Styles using C#.
The basic Window styles from when Windows first appeared, were already insufficient long before Windows became its own operating system. The native Windows API allows the user to create a Window with extended styles. The styles are well documented, and they have always been readily accessible, to specify, query and change.
This article is a segment of a three-part tutorial. So, in case you missed any of the previous posts, check them out.
Once, you are done reading these tutorials we can move on to see how to set extended window styles using C#.
Why do we need Extended Window Styles?

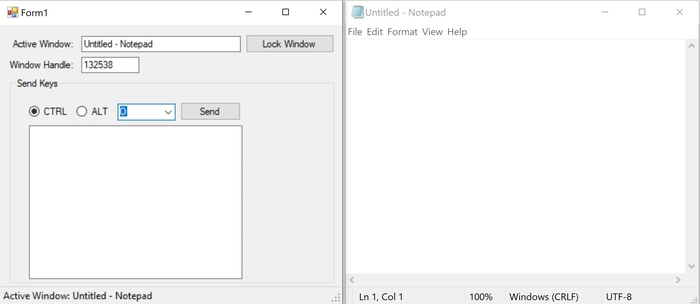
Remember the problem we had with window flickering? When we were in and out of focus, in the previous tutorial? Well, we want to fix that. And we can fix it by applying some extended window styles to our main form.
One of the problems we had is the window getting in and out of focus. What this means is that whenever we click on a control on our window, it gets the focus. We don’t want that. We don’t want the focus back on our main window. The focus should be on the other application.
If the other application doesn’t loose focus, when we are clicking inside our application, that means we can send commands and keystrokes without transferring the focus back and forth. That annoying flickering will be solved.
So, let’s see how do we solve that.
More DevInDeep Tutorials:
- Create Transparent Image using C#
- How to create Scrollable PictureBox Control in C#
- Learn how to scrape Web Page using C#
How to apply extended window styles?
First, we need to import a couple of more native “User32.dll” library methods.
GetWindowLong
GetWindowLong method retrieves information about the specified window. The function also retrieves the 32-bit (DWORD) value at the specified offset into the extra window memory.
[DllImport("user32.dll", CharSet = CharSet.Auto, SetLastError = true)]
public static extern int GetWindowLong(IntPtr hwnd, int index);
As you can see the method accepts two input parameters. The first one being a pointer or a handle to the window. Thus, it indirectly points to the class it belongs.
This method we are going to use on our own application window. We want our window to reside in the background without being active when a user performs action on it. However, to do that, we would need to obtain the window handle. That window handle will be provided as the first argument of this function.
That leads us to the second parameter. The more important one. It is of type integer. It represents a zero-based offset to the value to be retrieved. So, valid values are in the range zero through the number of bytes of extra window memory, minus four. Or, you can use one of the following values:
| GWL_EXSTYLE | -20 | Retrieves the extended window styles. |
| GWL_HINSTANCE | -6 | Retrieves a handle to the application instance |
| GWL_HWNDPARENT | -8 | Retrieves a handle to the parent window, if any |
| GWL_ID | -12 | Retrieves the identifier of the window |
| GWL_STYLE | -16 | Retrieves the window styles |
| GWL_USERDATA | -21 | Retrieves the user data associated with the window. This data is intended for use by the application that created the window. Its value is initially zero |
| GWL_WNDPROC | -4 | Retrieves the address of the window procedure, or a handle representing the address of the window procedure. You must use the CallWindowProc function to call the window procedure |
As you can see the function also has a return value. If the function succeeds, the return value is the requested value. Similarly, if the function fails, the return value is zero.
Set Window Long
SetWindowLong method changes an attribute of the specified window. The function also sets the 32-bit (long) value at the specified offset into the extra window memory.
[DllImport("user32.dll", CharSet = CharSet.Auto, SetLastError = true)]
public static extern int SetWindowLong(IntPtr hwnd, int index, int newStyle);
This method accepts three input parameters. First, the pointer to the window we want to assign the style to. Next, is the zero-based offset to the value to be set. And finally, the function needs the value itself.
In other words, we are going to pass the handle to our window, because we want to set it as not active and in the background. Then, we will pass the parameter for the extended window styles. And, at the end, we are going to provide the new value for the extended window style we want to apply.
Here is the table with all the possible styles we can apply:
| GWL_EXSTYLE | -20 | Sets a new extended window style |
| GWL_HINSTANCE | -6 | Sets a new application instance handle |
| GWL_ID | -12 | Sets a new identifier of the child window. The window cannot be a top-level window |
| GWL_STYLE | -16 | Sets a new window style |
| GWL_USERDATA | -21 | Sets the user data associated with the window. This data is intended for use by the application that created the window. Its value is initially zero |
| GWL_WNDPROC | -4 | Sets a new address for the window procedure. You cannot change this attribute if the window does not belong to the same process as the calling thread |
Again, we only need to set the GWL_EXSTYLE. We can talk about other properties another time.
Implement No Active Extended Window Style in C#
Finally, let’s see how we can use these methods.
But, first we need to declare two constants like so:
public const int WS_EX_NOACTIVATE = 0x08000000;
public const int GWL_EXSTYLE = -20;
These constants pertain to the property we want to set GWL_EXSTYLE and the value to deactivate the window WS_EX_NOACTIVATE.
The C# method implementation
public static void ApplyNoActiveWindowStyle(Window window)
{
     var interopHelper = new WindowInteropHelper(window);
     int exStyle = GetWindowLong(interopHelper.Handle, GWL_EXSTYLE);
     SetWindowLong(interopHelper.Handle, GWL_EXSTYLE, exStyle | WS_EX_NOACTIVATE);
}
The code inside this C# function is pretty self explanatory. But, let’s quickly review it.
First, we are obtaining the window handle/pointer. Then we are extracting the extended window styles that the window currently posses. Then, we add the WS_EX_NOACTIVATE property to the existing extended window styles.
As a result, the top level window with this style, does not become foreground window when the user clicks on it. The system does not bring this window to the foreground when the user minimizes or closes the foreground window.
The window should not be activated through programmatic access or via keyboard navigation by accessible technology. To activate this window you would have to use SetActiveWindow or SetForegroundWindow function. Also, the window does not appear on the taskbar by default.
If you want this window to appear in the taskbar, then you have to explicitly code that feature.
You can check more information on the Extended Window Styles here.
How to set Extended Window Styles using C#
Bottom line, we want our application window to sit quietly in the back. As a result, the user will be able to press any button on our window and the system won’t bring it into focus. Thus, allowing the focus to be on the window the user is currently working in.
A Virtual Keyboard has this style. It sits quietly in the background while the user is pressing buttons on that window.
Once we apply that, there is no need to shift the focus back and forth. As a result, the user won’t see any window flickering. Or, windows changing focus for that matter.
Apply the Extended Window Style to our Main Window
WPF Solution
Finally, we can apply the style. Do remember that when applying Extended Window Style, make sure you use the SourceInitialized event. This event is raised to support interoperation with Win32. Because we are actually using native Win32 methods we need to write our C# code when this event is raised.
window.SourceInitialized += (s, e) => WindowApi.ApplyNoActiveWindowStyle(window);The parameter window is the actual window on which you want to apply this style.
Windows Forms Solution
Applying the Extended Window Style to a Windows Forms solution is a little bit different. Every single Windows Forms control has a CreateParams property. This is a class which encapsulates the information needed when creating a control.
This property should only be extended when you want to set styles not provided by the Windows Forms namespace. This means, we are going to override the CreateParams property on the main form itself.
protected override CreateParams CreateParams
{
     get
     {
           CreateParams param = base.CreateParams;
	   param.ExStyle |= 0x08000000;
	   return param;
     }
}
As you can see, this property gets the required creation parameters when the control handle is created.
Show the Window on top of every other
When creating applications like these we also would want our main window to live on top of every other window. This is because we are using this application to control other apps. You can apply this style directly through C# code, but you can also apply it via the Extended Window Style properties as well.
In regards to this project, we are going to set the TopMost property on Windows Forms and WPF.
A topmost form is a form that overlaps all the other (non-topmost) forms even if it is not the active or foreground form. Topmost forms are always displayed at the highest point in the z-order of the windows on the desktop.
Form.TopMost Property (System.Windows.Forms) | Microsoft Docs
What this means is that you need to set the TopMost property to true.
//Windows Forms
form.TopMost = true;
//WPF
window.Topmost = true;
And, you are all set. The problem with the window flickering and constantly switching between active windows is no more.
Conclusion
It seems like we have everything we need to create a Virtual Keyboard. We saw how to get and set the active window. Then, we were able to code our program to send commands and keys to another window. And now we saw how to set extended window styles using C# to our application as well.
We have everything we need to code an On-Screen custom Keyboard. So, join me in my next tutorial where we are going to build this project up.
